Winter mittens, a little late.

The swans are in the lake and the daffodils are blooming; I have finished a pair of warm, double-layered, felted wool mittens. Not quite impeccable timing, even though I like the mittens themselves very much!

There are two mittens, obviously, but my other hand is taking the picture.

In my defense, I did start them in the winter, but I think that my baby precociously developed an understanding of irony; she started sleeping through the night the evening before my return to work. The Venn diagram of, “Time” and, “Energy” is most often two circles so far apart that you could practically lie down between them.

Don’t mind if I do…

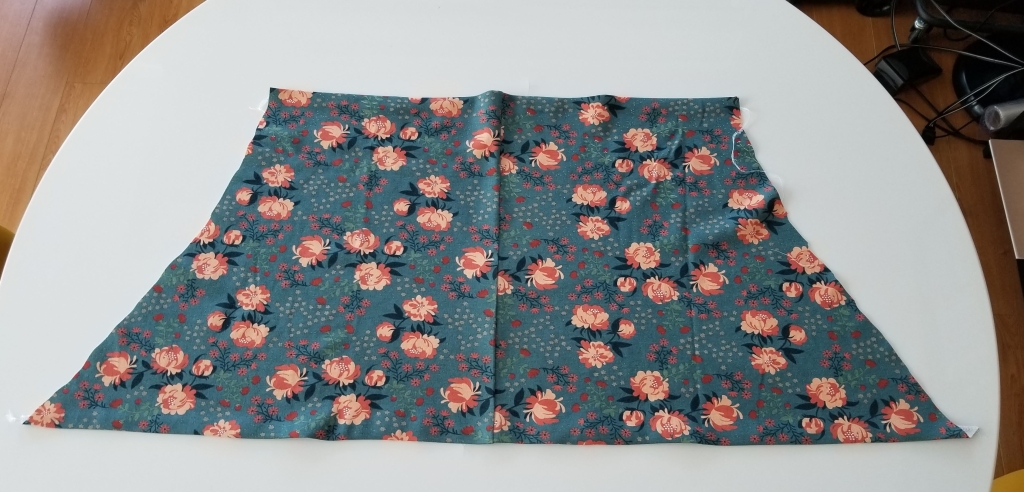
Anyway, the “make winter accessories out of old sweaters” trend has been around as long as the internet, but I never had a sweater I really wanted to use that way. However, I did have two pieces of wool knit in my scrap bag: a pink cashmere shirt and a piece of a green wool/silk skirt. I felted both by running them through a hot wash and dry twice, and figured that I’d make luxurious double-layered mittens.

This is after felting, which is why the sweater looks a bit wonky.

All I did needed to do was make two pairs of mittens, slip one inside the other, and hem. Easy, right?

Titled: The Effects of Sleep Deprivation, January 2022

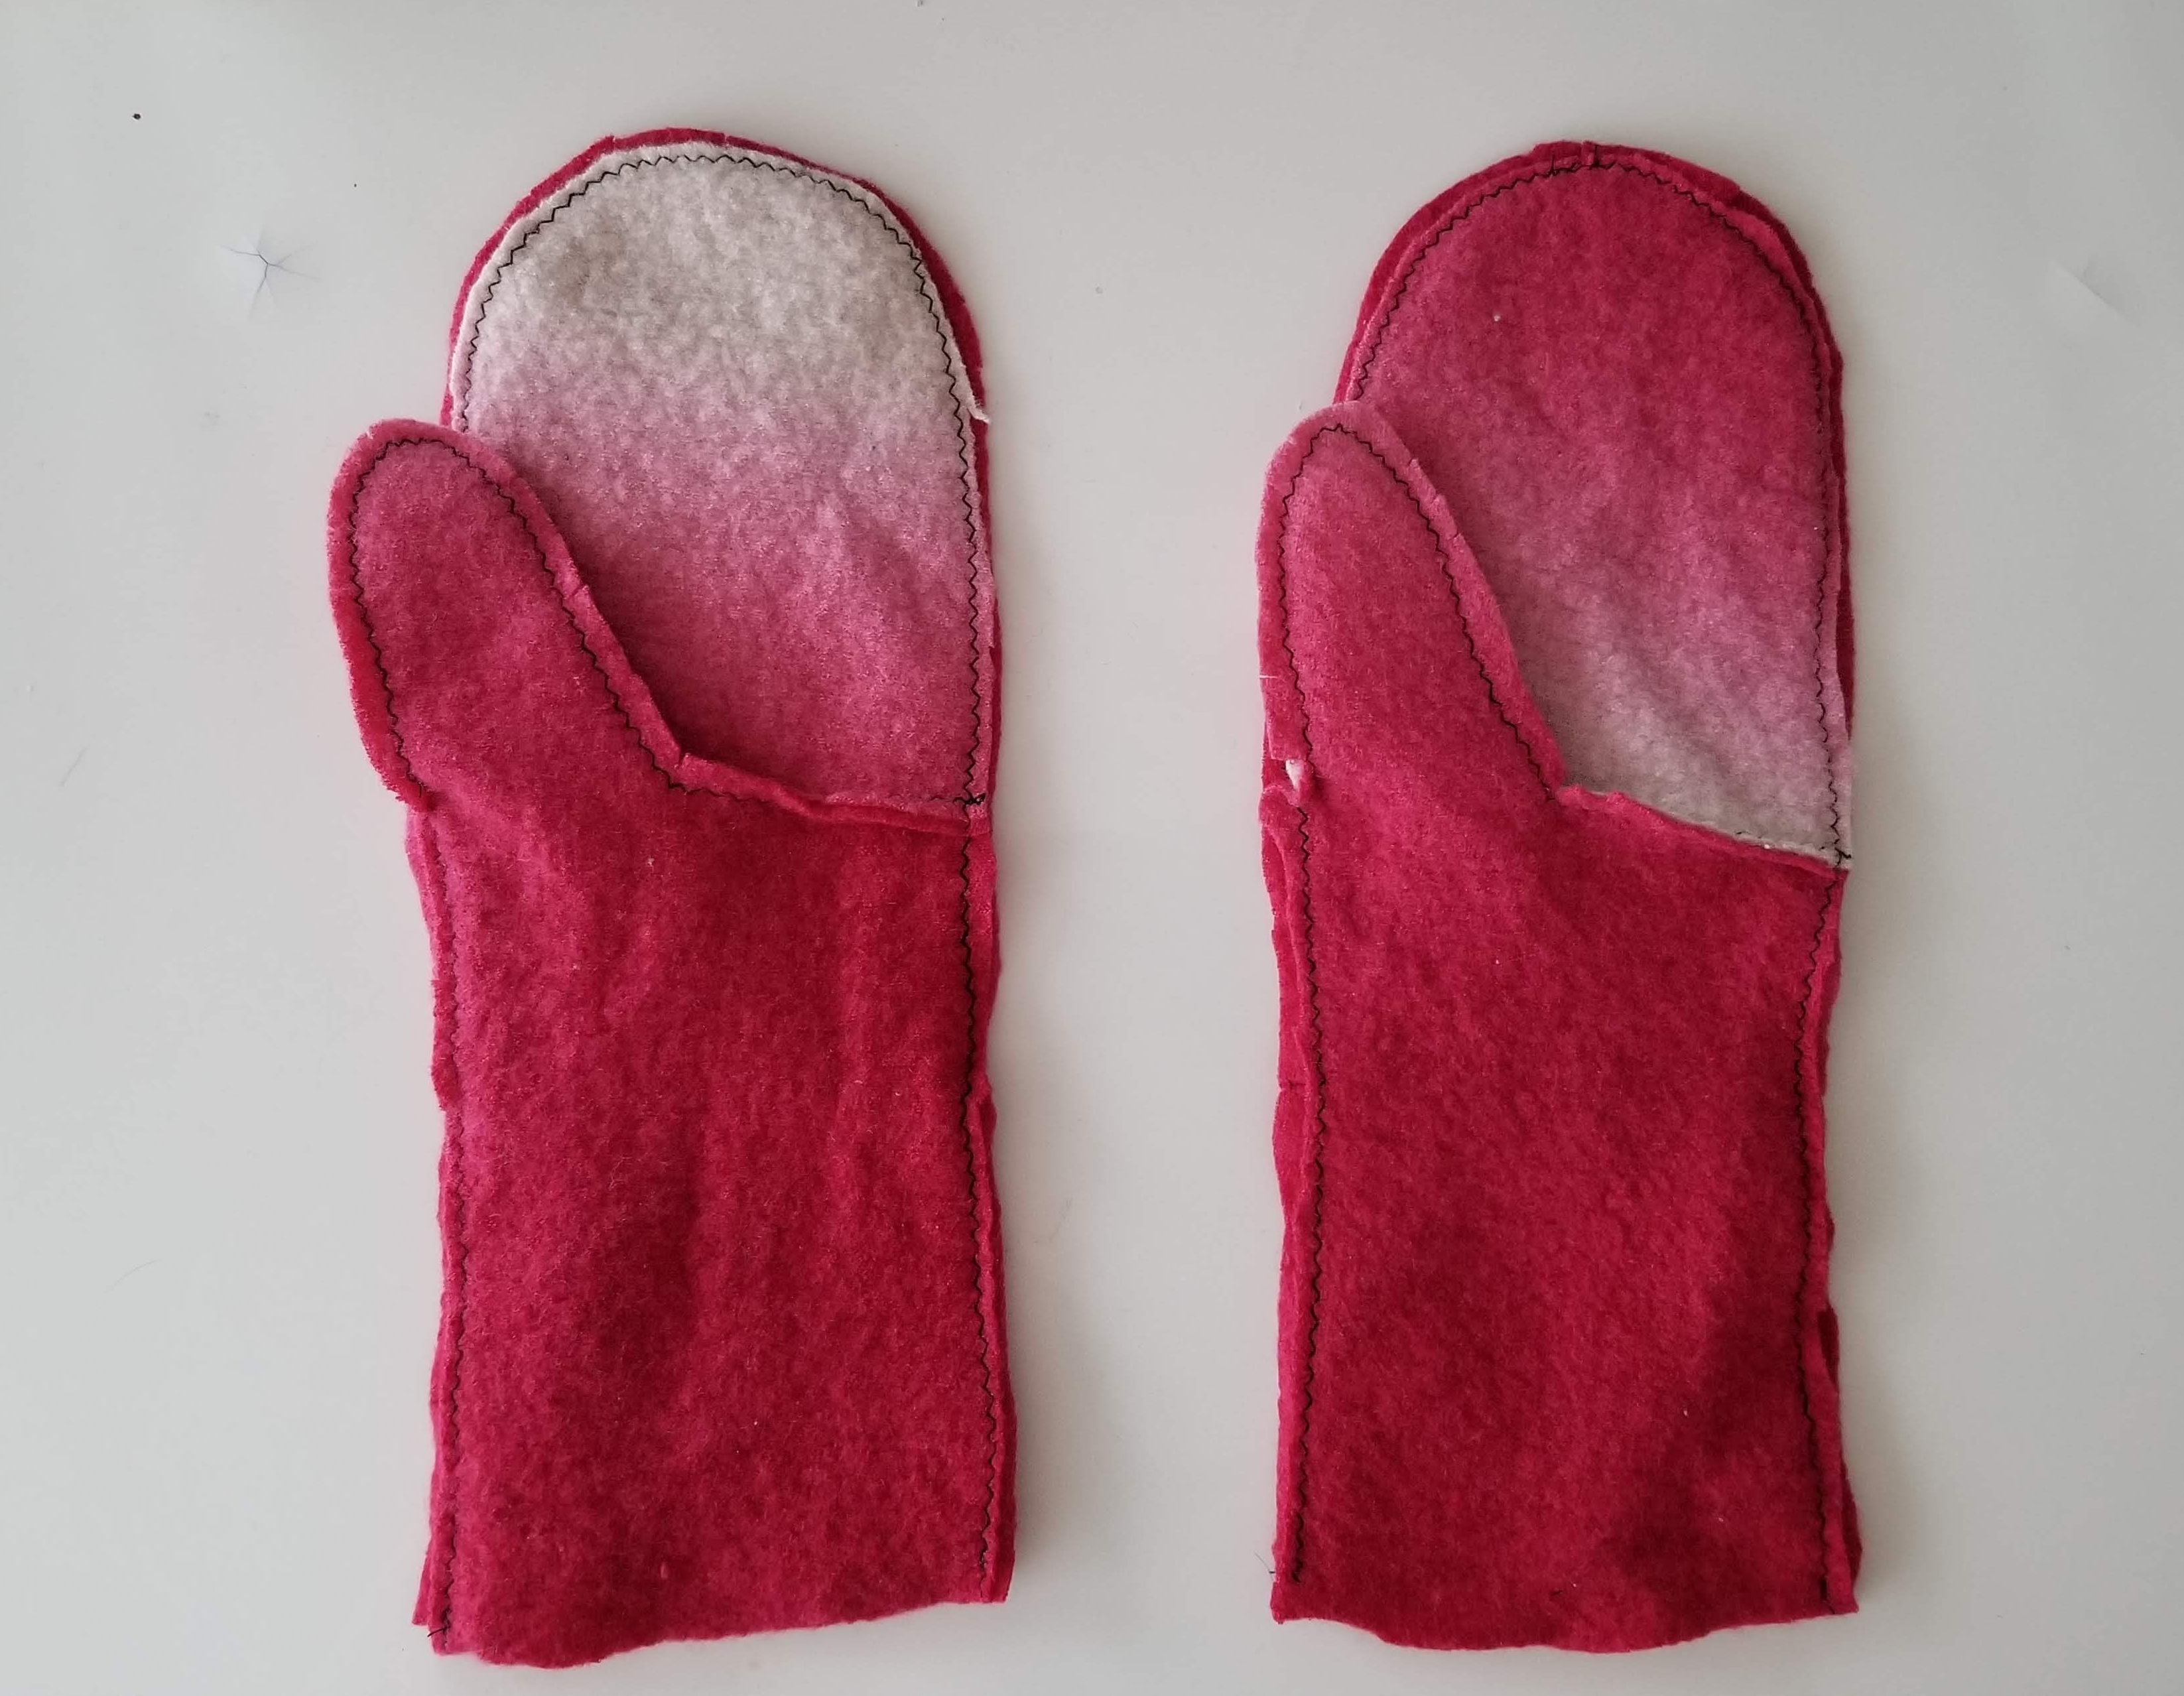
Sigh. So, then, I unpicked one pink mitten to make a right and a left.

Much better!

For the green outer mittens, I used a smaller seam allowance to make them ever-so-slightly bigger than the pink ones. It helps them lie together without wrinkling, which is more comfortable.

See, the green mittens are bigger.

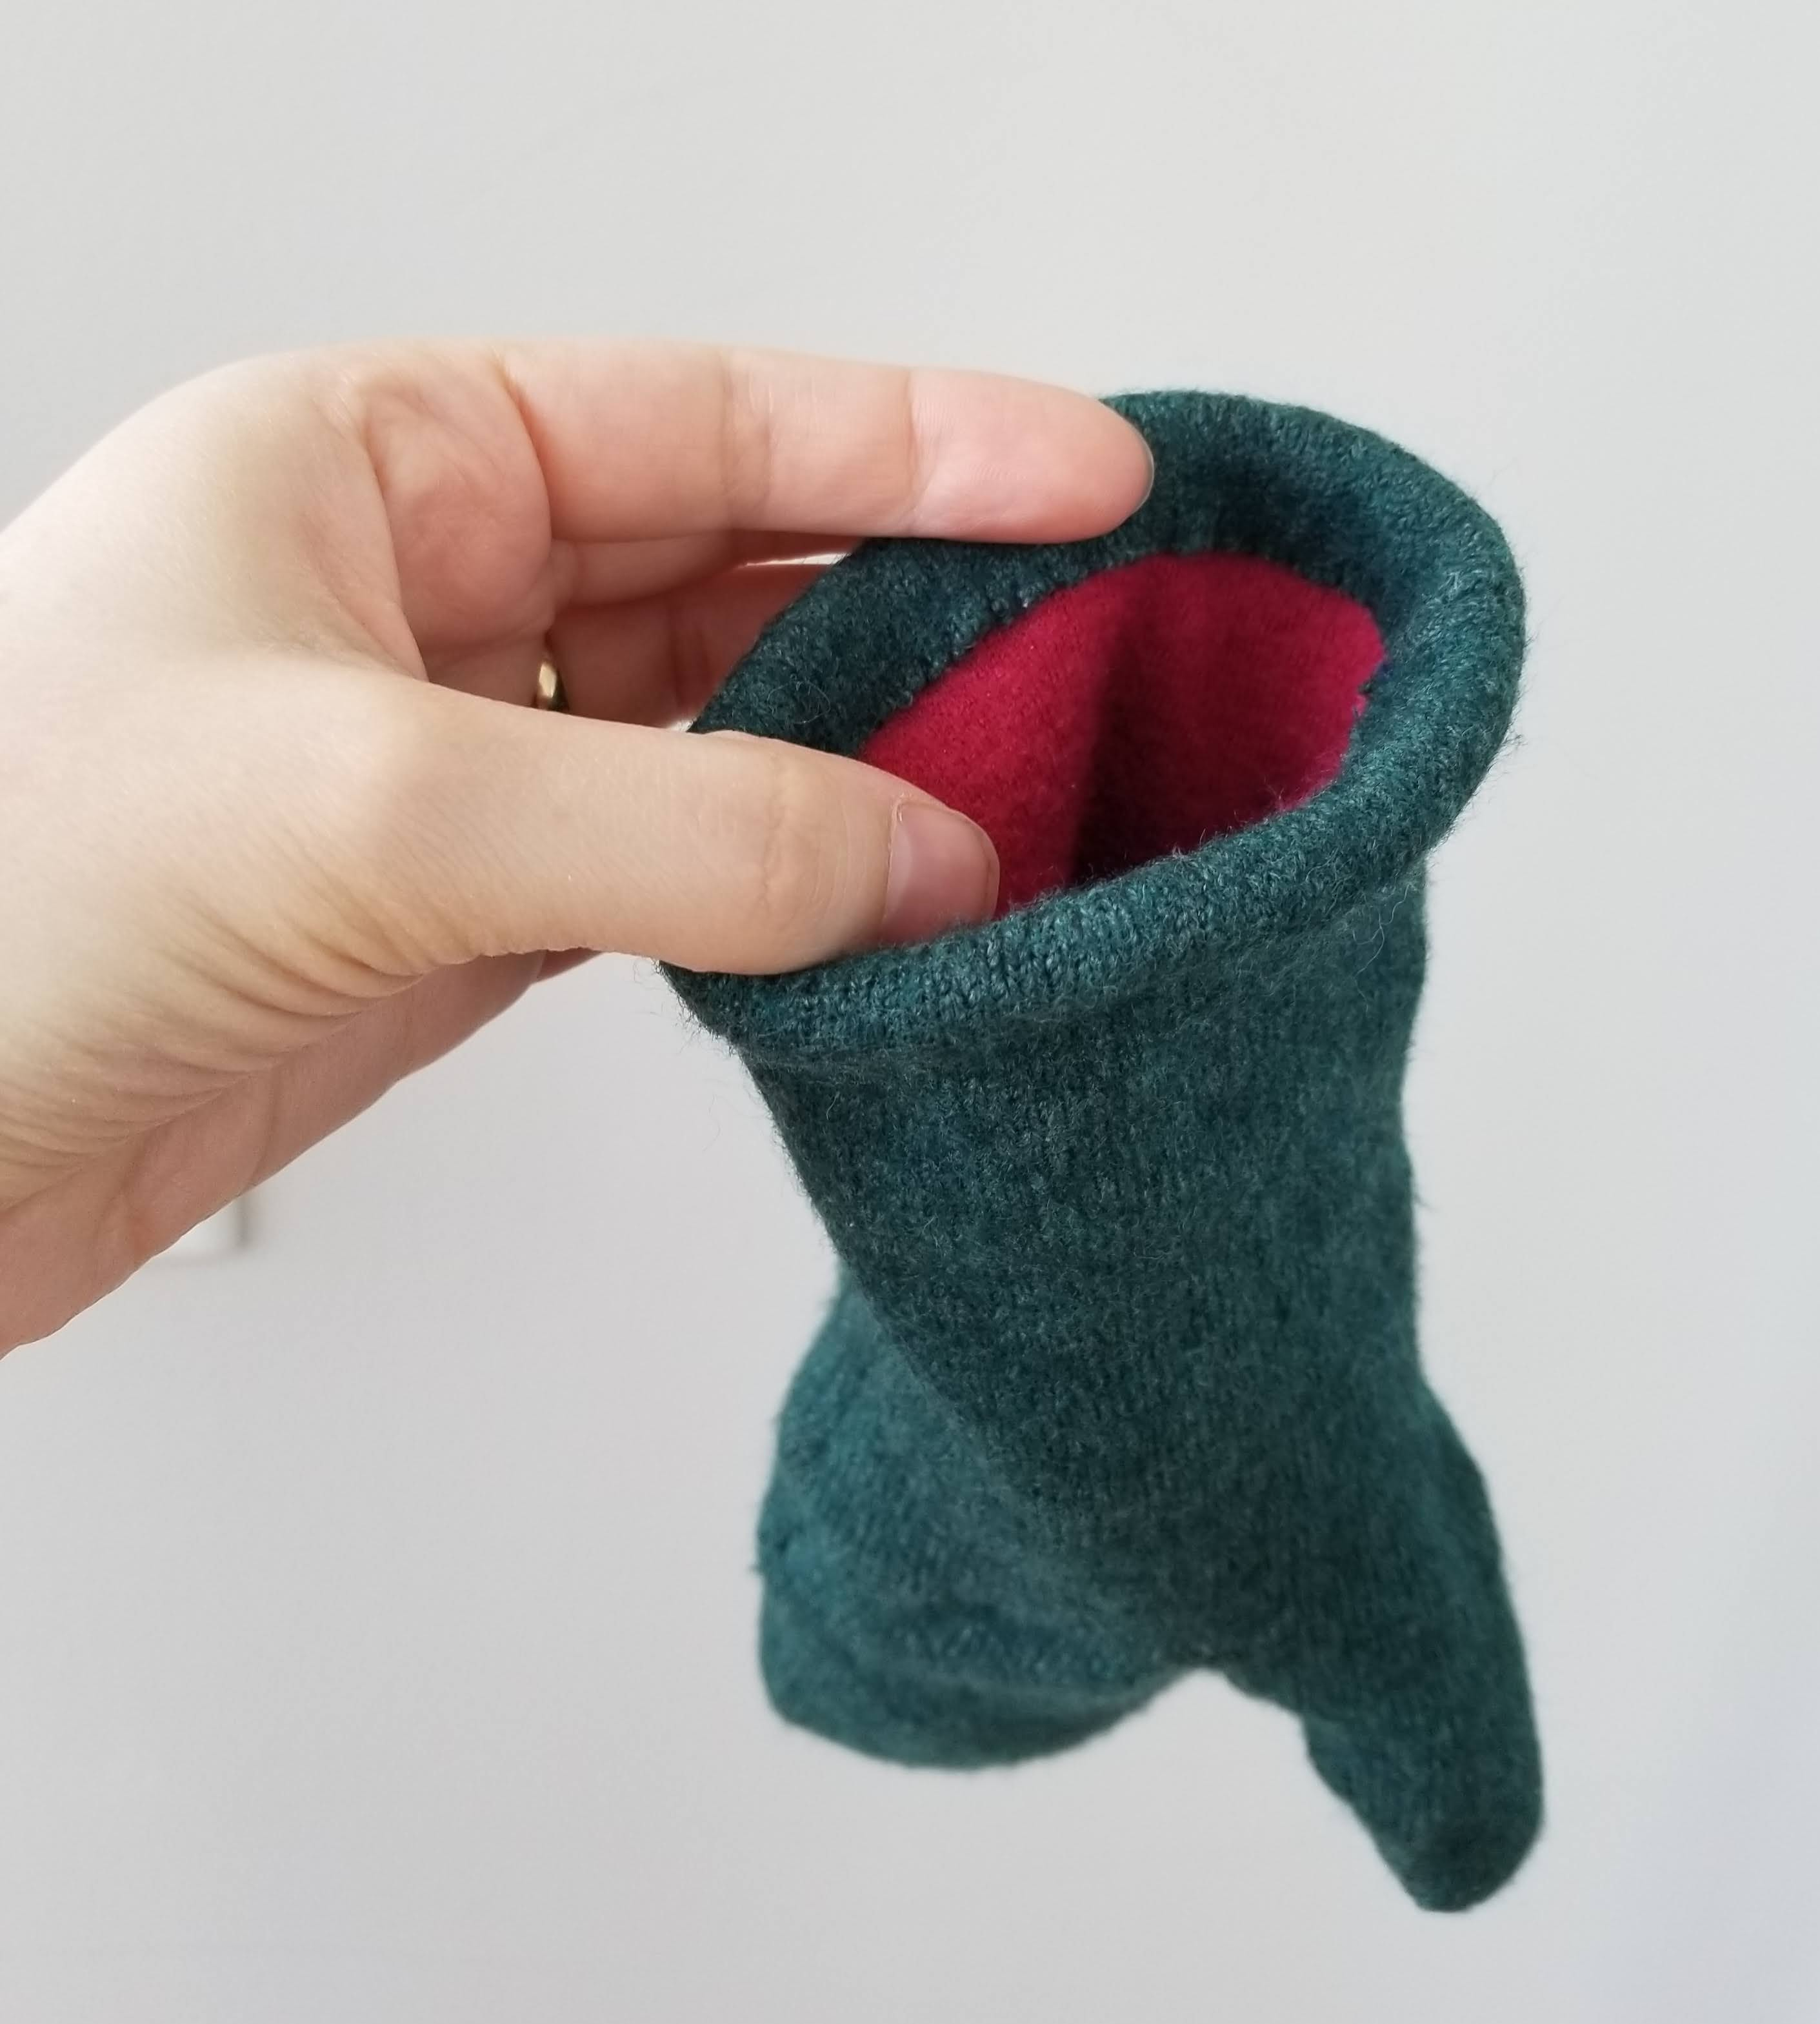
Then, I tucked the pink set inside the green set, folded the green hem over the pink, and whip-stitched it down.

Tucked in neatly! Also, you totally can’t tell that I didn’t have green thread and just used navy blue.

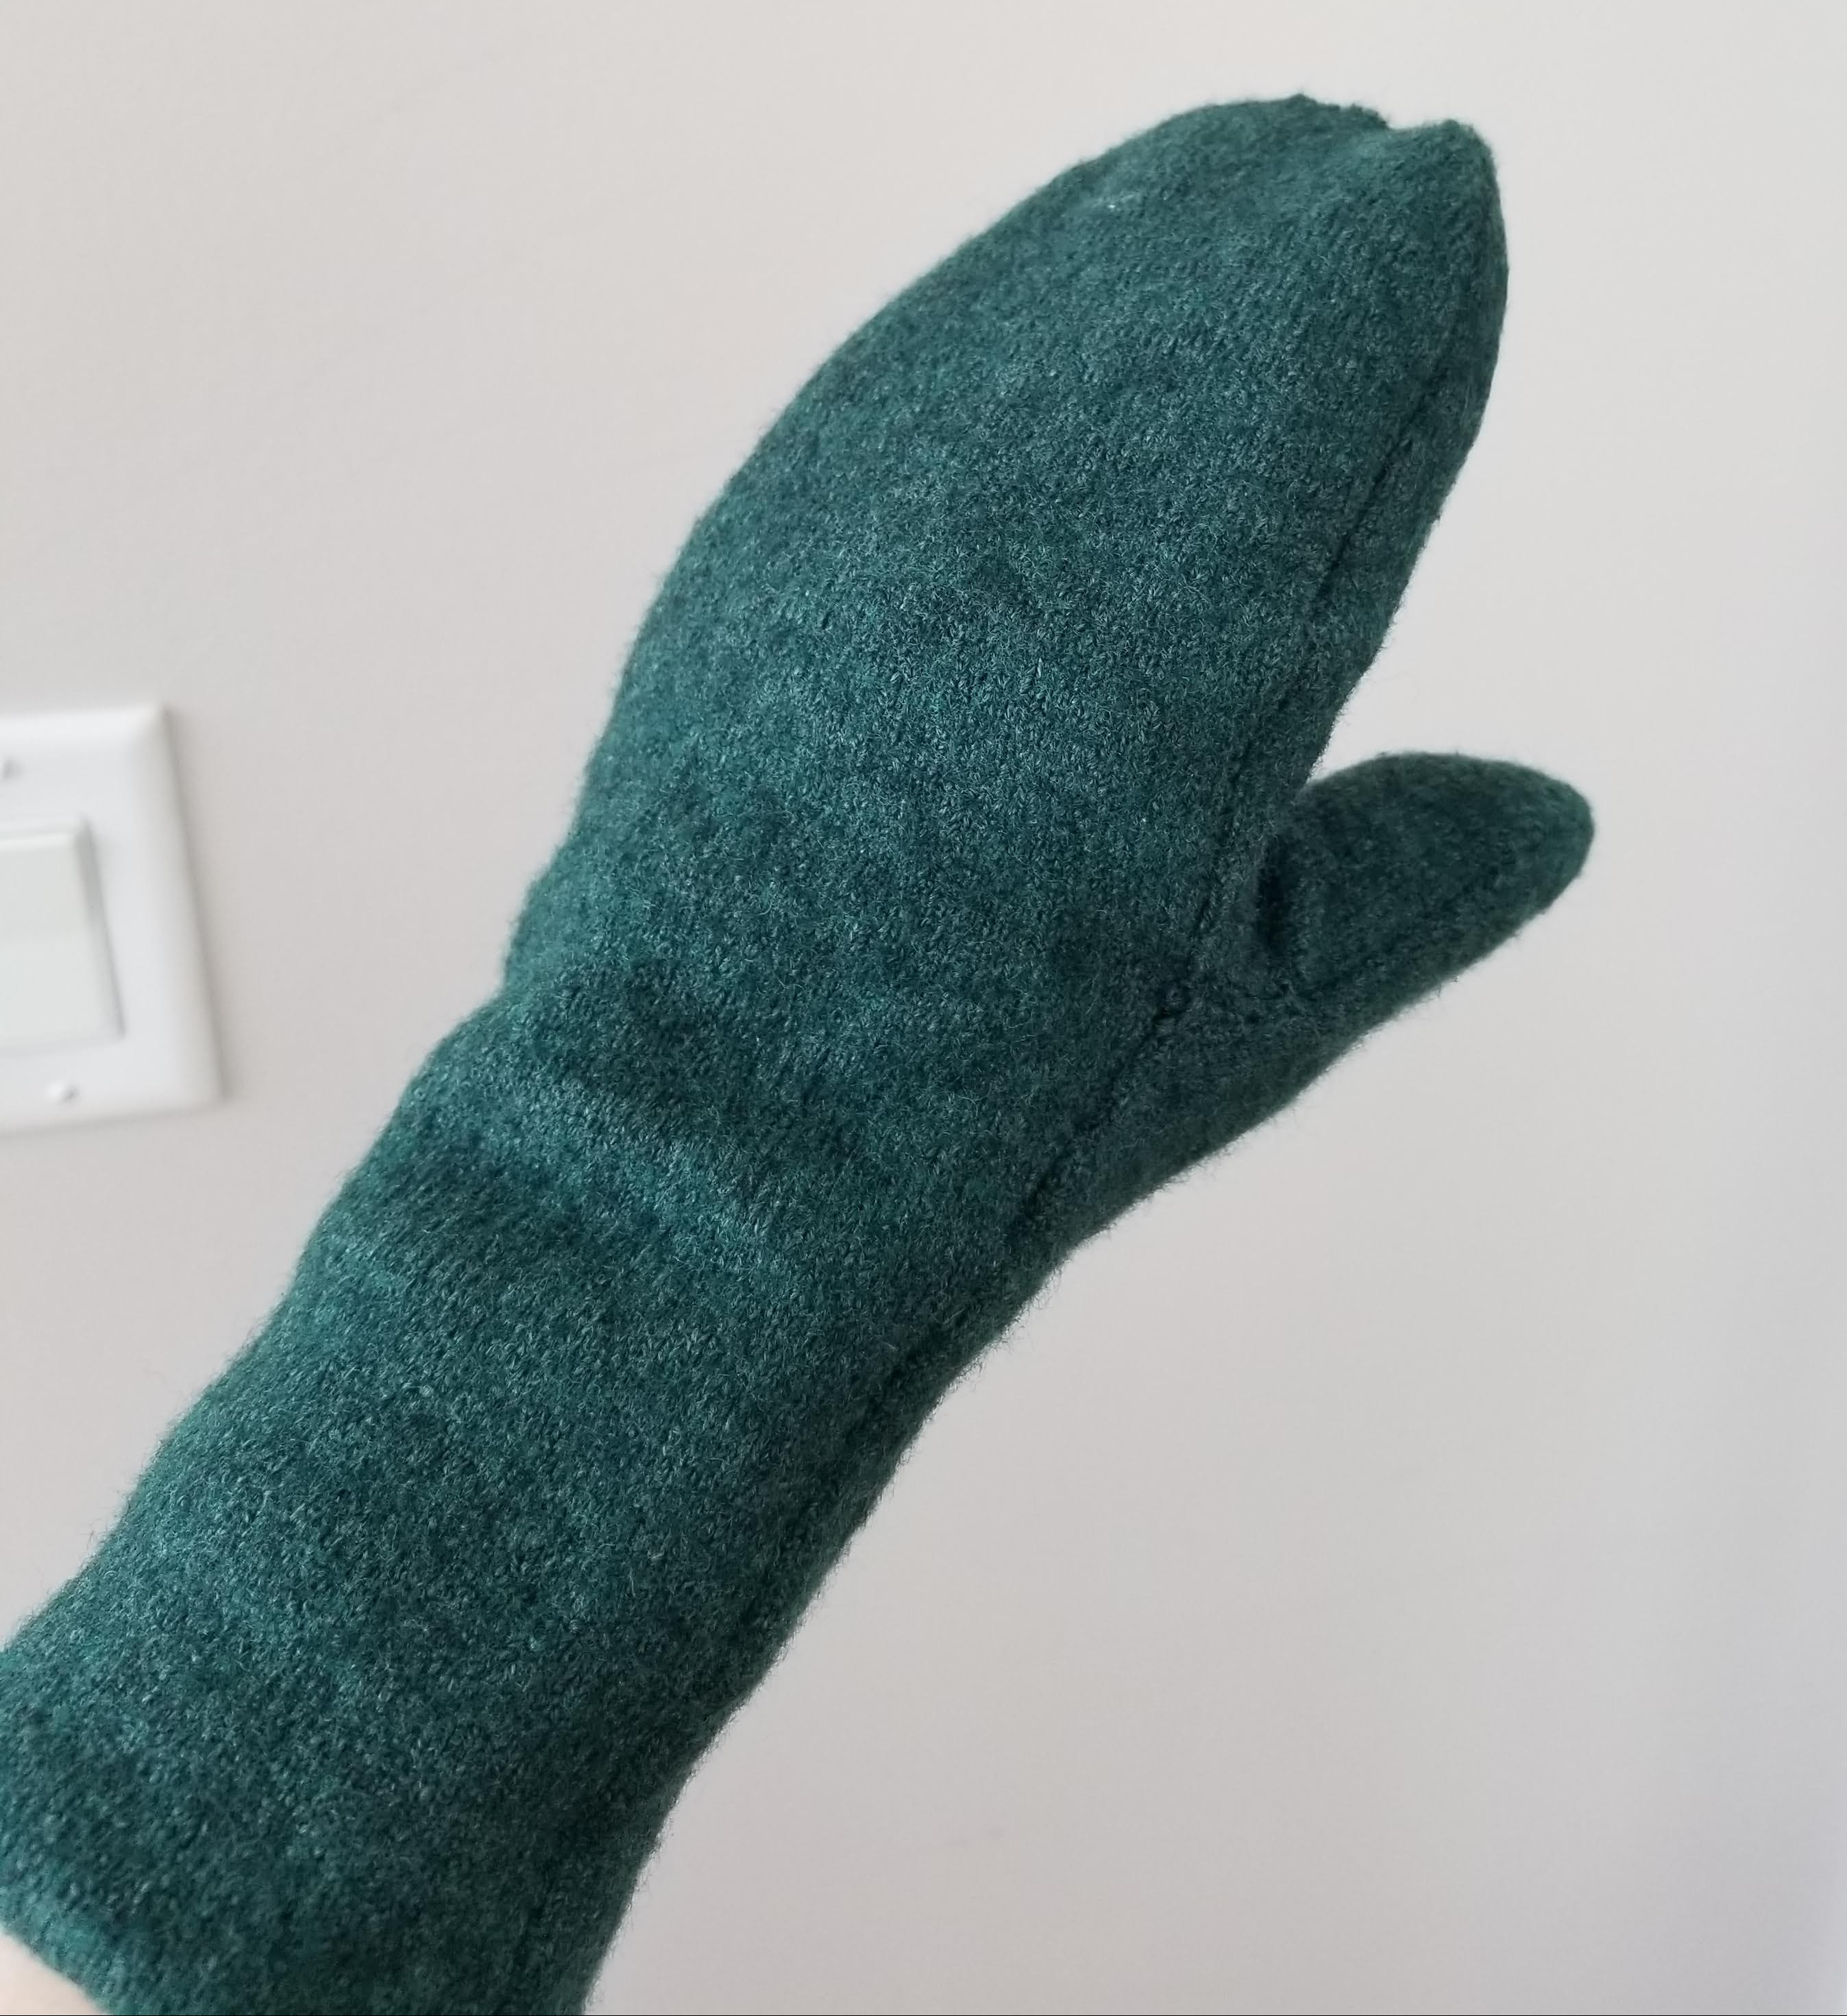
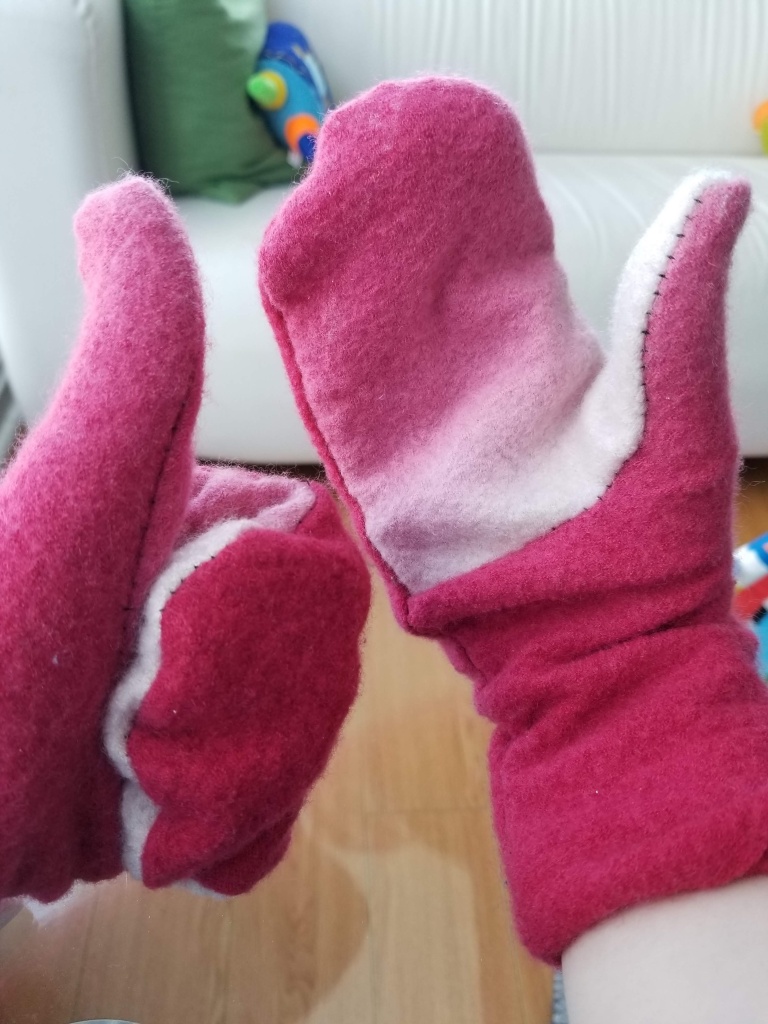
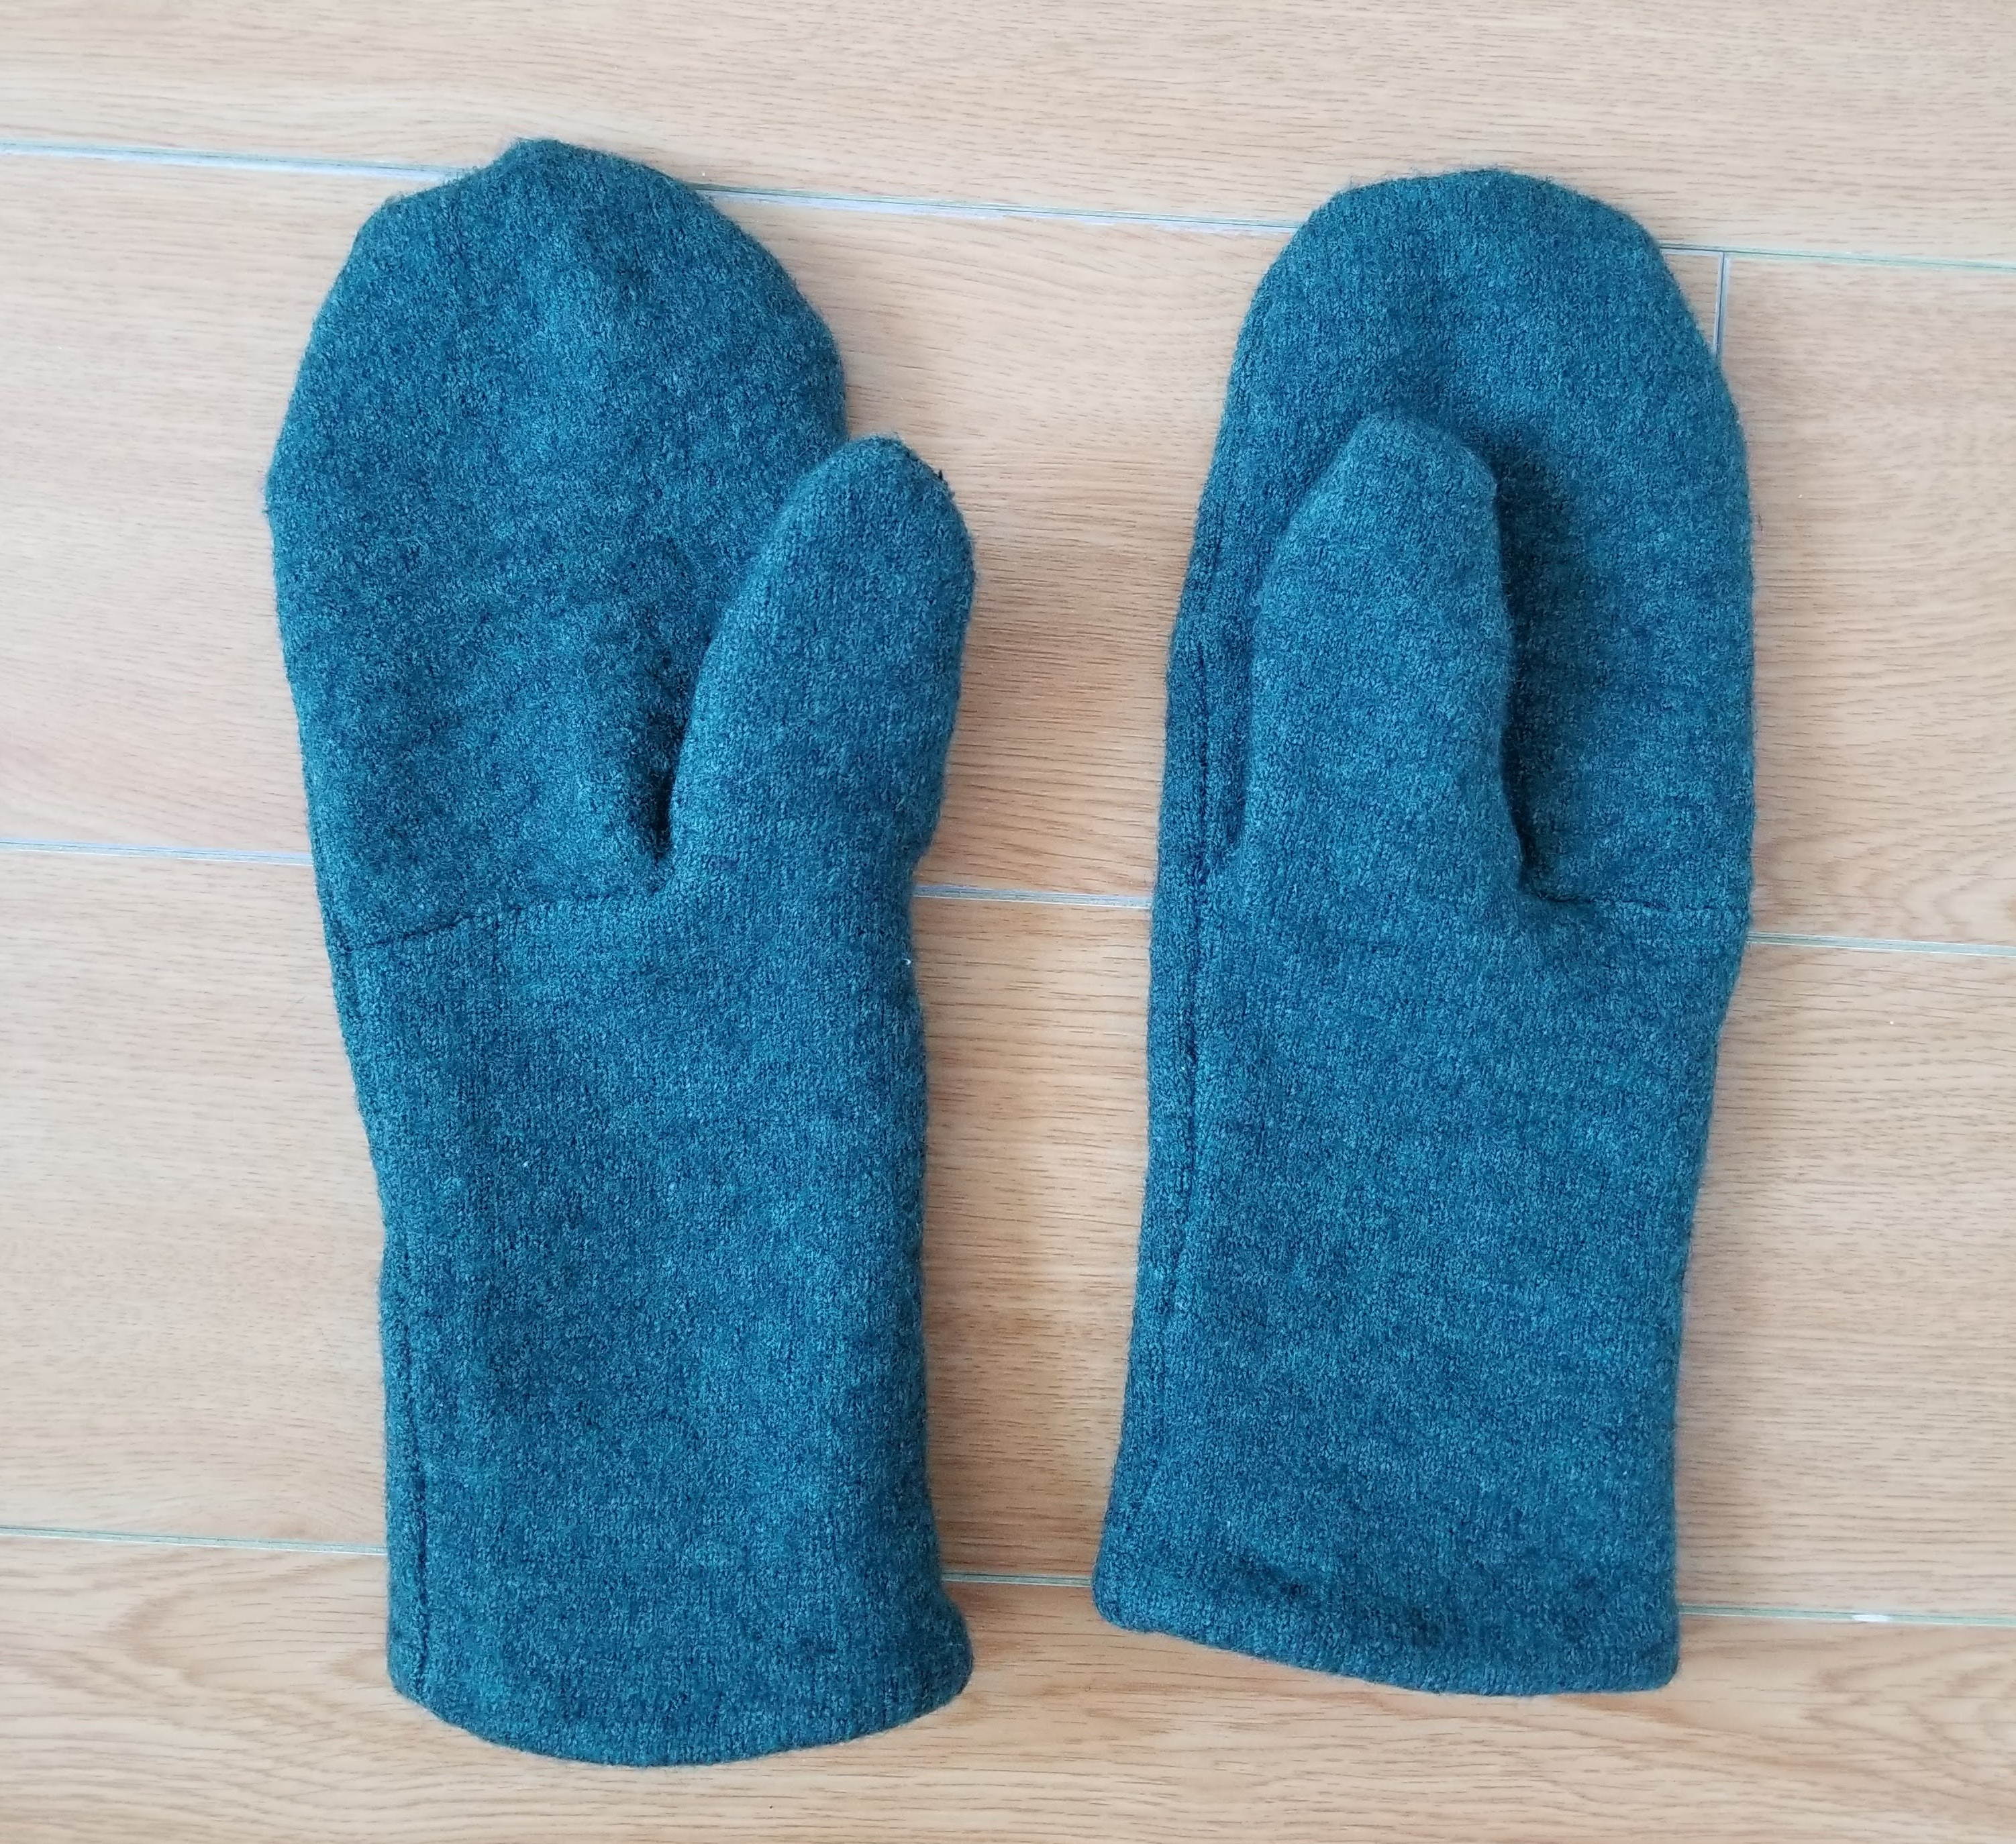
And that’s it: beautiful, warm mittens. They feel downright luxurious! I could get used to cashmere. I like the shape of them, too; because the thumb protrudes from the front instead of the side, the mittens don’t twist around my hands. They tend to slide down my wrists because there isn’t any elastic or ribbing to hold them up, but overall they’re great.

Are they a wee bit wonky? Yes! Do I care? No! Do I know how to colour-correct photos? Also no. Sorry. They’re a dark forest green.

In Conclusion:

Materials: Two pieces of felted knits from hand-me-down garments.

Pattern: Simple Felted Wool Mittens, free from Purl Soho. I messed up the printer setting and they’re about 12% smaller than they should be, but I have small hands so it worked out.

Cost: I’m calling this a freebie.

Final Thoughts: These are so cozy! The cashmere is incredibly smooth and soft but I dislike the colour; using as a lining is a perfect solution. They’re warm, soft, pretty, and easy to make (even if it did take me three months.)

A Long Black Cabernet Cardigan

After making a very practical grey Cabernet Cardigan for my upcoming return to work, I decided to make a black one! This may be the most non-descript garment I’ve ever made, but I really like it! This time, I made view A, the long and boxy version, in a size M graded to an L at the hip. I used the optional bust darts.

Pockets!

This time, I cut the neckband correctly (though it still wings out at the sides of the neck, but as you can see–or can’t, really–my hair covers it up) but I ran out of fabric for the waistband. Sigh. That’s what happens when you just buy random lengths of fabric for, oh, ten years, and then try to use it up. I pieced the waistband together by adding side seams and it worked out fine. I’m big on adding extra seams when you don’t have enough fabric.

See? The extra seam is barely visible.

I omitted the topstitching due to feeling lazy, but it makes the button band flip inside-out when I wear the cardigan open, so next time I’ll include it.

Boxy is an accurate descriptor

I decided to save myself struggling with my automatic buttonholer and hand-sewed the buttonholes again. These came out better than my last ones!

I’m really pleased with how it turned out! It is pretty boxy, and I probably could have managed with a straight size M, but I don’t mind the looseness over my hips and bum. I wonder if the relative stiffness of ponte compared to a typical sweater knit makes it look a bit more bulky than it might otherwise?

It’s pulled in a strange way, but it illustrates that there’s a LOT of extra fabric around the hips.

Regardless, overall I think it’s terrific! The only thing I’d change is to cut the pockets bigger next time. These are on the petite and chic side; I require cavernous pockets in which to carry my phone, my wallet, a pen or two, my folded up to-do lists, a snack…you know, the essentials.

In Summary:

Materials: 1.5 m black rayon/polyester ponte ($12 from Fabricland), five plain black buttons of unknown origin from my stash.

Pattern: Cabernet Cardigan, which I already owned.

Cost: $12 CAD

Conclusion: I’m delighted with this pattern! It’s scaled perfectly for a short person; I’m 5’2 and didn’t alter the length at all. This might be the most boring garment I’ve ever made, but I really like it. It’s rare for me to find a long cardigan that doesn’t pull over the hips and bag at the sleeves. Well-fitting basic clothes that I can wear and not really think about is exactly what I was after when I started sewing. Really, I was about 17 and I just wanted a plain grey cotton t-shirt to wear with jeans and a cardigan to school (ahem, my style evolution is non-existent) and I could not find one that wasn’t too tight, too low-cut, too polyester, too thin, without slogans on it…it’s strange to think that this is the cardigan of my teenage dreams, but I guess it is!

If You Hear Hoofbeats, Think Zebras! (A Zebra Baby Sleeper)

Since discovering the second-hand baby clothes market, my motivation to make baby clothes has plummeted. I could spend hours making baby clothes…or I could just buy sleepers for a dollar apiece. Alas, sometimes I want something specific, or my frustrations with the children’s clothing industry bubble over (Do little girls have to wear only pink? Why are her clothes so thin and tight? Why use scratchy fabrics for an infant?)…and out comes the sewing machine! In this case, I wanted her to have a thick sleeper that could go over her clothes without interfering with her car seat straps.

All the better if it has zebras!

Enter: the Green Bean Baby Set sewing pattern. Because I had tried to use the pattern previously to disastrous effect, I checked very carefully that all of the pattern pieces for a a hooded, footed, mittened, zippered sleeper would line up. Unfortunately, the left front piece is unusable. It’s several inches too long, as is the corresponding facing. To fix that, I simply threw those pattern pieces away and used the basic sleeper shape as a template to trace a new left front. Otherwise, many pieces need a few millimeters of fudging, and the hood is weirdly small even though it technically works.

See? The hood is tiny! But I am SO PROUD of that zipper.

I decided to make the sleeper double-layered, so I used old sweatpants for the lining and zebra-printed interlock for the exterior fabric. I bought it on a weekend trip that I took to Niagara Falls and Buffalo when I turned 27. It feels so strange; that was the last summer that life was normal. How things change! When I took that trip, I was a single student living in a different city in a pre-pandemic world…it feels like a lifetime ago.

Two sleepers, insides out, attached at the belly.

Misty-eyed nostalgia aside, the assembly of the sleeper was easy. I decided to challenge myself to enclose all of the seams, and managed to do it except for the feet and the cuffs. I took the time to baste in the zipper, which I think gives a particularly nice finish, and was ultimately easier than using a thousand pins.

The cuff has a clever flap that flips over the hand for warmth.

There are definitely good things in this pattern: the hood construction gives a tidy finish and the mitten cuffs are very clever, though I get frustrated when I spend money on something requiring major correction. All that said, I’ll definitely use this pattern again, with a big dose of caveat emptor!

In Conclusion:

Materials: About 0.5 m of a 1.5 m cut of zebra-printed cotton interlock, bought at Joann Fabric in Buffalo for maybe $15 CAD. The lining was an old pair of sweatpants that I bought at a Walmart on my way home from a miserable elective during a miserable winter; I wore them constantly because my apartment’s heat kept cutting out…yeah, maybe I’m not so nostalgic for my student days after all. A white zipper from Needlework for about $2 CAD.

Pattern: Green Bean Baby Set, $12. I recommend it with caveats: if you make the sleeper, you’ll have to re-draft the left front. This is size 64 (i.e. for a baby 64 cm long.)

Cost: About $29 CAD.

Final Thoughts: I am incredibly pleased with the final product. The sleeper is heavy and warm and beautifully finished, if I do say so myself. There are little things that remind me that it’s handmade–I cut the front lining pieces with the fluffy sweatshirt side out instead of the smooth knit side; I sliced a hole in the foot seam and had to close it up by hand; the topstitching on the hood is a little rippled and the zipper guard doesn’t quite work because I didn’t line it up perfectly–but on the whole I think it looks really, really good! I absolutely love it.

A Rather Belated Baby Blanket

I’m calling it: this is my most impressive work of 2022. Nothing I make will beat it!

The garbage and spare box under the crib are there for “realism” lol

This blanket is made out of many, many individual puff-stitch flowers. This was a phenomenal amount of work, and while I’m delighted with the outcome, I had no idea what I was getting myself into when I started this project.

One down, an untold number to go…

Initially, I figured I’d need about 80 flowers. I chose four colours and planned to use cream for the centre of each flower, but once I got started I realized that adding cream as its own flower colour would add some much-needed contrast.

Spoiler: I needed way more than 80 flowers.

At seven months pregnant I started to crochet. Once I had my 80 flowers, I laid them out and realized that I had something the size of a placemat. Hm. So, I continued to crochet. At eight-and-a-half months pregnant, I had 125 flowers. I laid them out and realized that I had something the size of…a slightly larger placemat. ARGH! Ultimately, the baby was born in mid-September, and I finished this blanket at the end of January with 252 flowers. Whew!

A big ol’ pile of flowers

I used what remained of the pale blue yarn and some of the cream to slip-stitch the flowers together. I used a random number generator to help get a pleasingly random arrangement, but made sure no two adjacent flowers were the same.

Hoots the Owl, looking surprised to be a photo double for my daughter

I also added a puff-stitch border to secure and even out the edges. It was improvised and doesn’t look great but I’m fine with it. There are other small errors too, like flowers with the wrong number of petals.

Despite that, I’m really pleased with the blanket. Because of the puff-stitches, it’s cushion-y and very warm. I do suspect that as soon as I give it to the baby, she will find the strands of the puff-stitches irresistible and will dig at them with her wee fingers; it remains to be seen how well this blanket will last! It’s still not huge, I must say; it’s not even big enough to be a lap blanket. I may someday buy more yarn and extend the border, but for now, it’s DONE!

In Conclusion:

Materials:
Cascade 220 superwash merino and regular Cascade 220 superwash. I bought everything at Romni Wools except for a second ball of cream wool, which I ordered from Yarn Canada. I used a 4.5 mm crochet hook.

Pattern: Mollie Flowers, available for free on Ravelry. I pulled up 8 strands in each puff-stitch instead of 9. I made 252 flowers. The blanket is 18 flowers by 14 flowers; about 90 cm x 60 cm

Cost: About $100 CAD. Whew! That much wool was pricey.

Final Thoughts: There are some negatives. The blanket is smaller than I’d like and liable to be picked apart by little baby fingers. At the same time, it’s beautiful, soft, and warm! Overall, I’m very pleased with how it came out.

A Little Cardigan for My Little Baby

I made a merino-silk-cotton cardigan for my baby. Is is ridiculous to dress a baby in the most luxurious textiles possible? Actually, wait, don’t tell me.

The buttons are a rabbit, a fish, a duck, and turtle!

I had this pair of socks that I hand-knitted yonks ago in a really nice yarn from Cascade that they’ve since discontinued (the nerve, to not carry exactly the same product ten years later.) I didn’t actually wear the socks much, because I hadn’t managed to make them the same size (heh) so I unravelled them!

I chose the Fuss Free Baby Cardigan Pattern, and held my sock yarn doubled. Unfortunately, I ran out of yarn! The 100g listed must be for the 0-3 month size, not 3-6. I found a ball of soft dark blue cotton in my parents’ basement and used that to finish the sleeve and button-band….and then I found a tiny leftover ball of the green yarn at the bottom of my yarn bag! ARGH! Oh, well. I’ve tried to convince myself that the sweater looks cool and not like a hack-job, but you know what? It’s soft, it’s warm, and the baby is deeply indifferent to what her clothes look like. Also the little animal buttons are cute.

In Summary:

Materials: Recycled merino-silk yarn from a pair of socks, and a bit of sport-weight cotton that I had lying around; I bought it to make a hat years ago but I think the pattern didn’t work out. Buttons from my stash, from a big grab-bag at a thrift store. Because cotton is not at all springy or elastic, the sleeve with cotton yarn looks longer despite being the same length as the other.

Pattern: Fuss free baby cardigan, with the sleeves lengthened to come to mid-forearm. It’s a free pattern, but the designer requested donations. I donated to my local children’s’ hospital.

Cost: I’m going to call it free, but with a donation to the hospital. The materials were recycled from other projects, and the buttons cost pennies a long time ago.

Final Thoughts: You know what? It’s pretty cute! I might be biased because I think that my daughter is adorable regardless of what she’s wearing, but I really do like the green yarn a lot and the blue is not so bad. It was a quick little project that gave me a boost in the midst of the interminable baby blanket that I’m crocheting for her. Sigh. More on that, soon.

2021: Year in Review

It’s always strange to look back on the sewing year. I start the year with such lofty goals, and finish it surprised (again) that real life interfered with my fantasies. Here’s what I made this year:

Row 1: A Cabernet cardigan (not worn yet, but I love it), a Tiramisu dress (failed, never wore it), and a nursing top (loved it, wore it a lot post-partum until the weather got cold).

Row 2: Another nursing top, (ditto on the success), two bassinet sheets (turned out the baby hated the bassinet and refused to sleep in it, so these were unnecessary),

Row 3: Three receiving blankets (worked fine), four crib sheets (probably more than we needed, but so cuuuuuute!), a red silk Kielo dress, and a swing dress copied from RTW (I wore it twice a week for the last four weeks of pregnancy). Not pictured, but I tried to make my own nursing pads, which didn’t work at all.

Now, my most significant project is not pictured; I had a baby in September (a sweet, snuggly girl), and my pregnancy really ran the show in 2021. While I am deeply aware of how fortunate I was to be healthy, I felt like absolute garbage for nearly the entire nine months, and going through a pregnancy as a resident during COVID was…not easy, to say the least. Creative work (other than, you know, gestation) took a backseat. My one single yarn project of the year was a baby blanket, and it’s still not done!

I’m hoping that 2022 can include more making, even though we now have a baby and I’ll be back at work in the spring. Who knows what the year will bring? Here’s hoping it’s better and better.

New Year’s Eve Kielo Dress

Here is my final project of 2021! I whipped myself up a new dress, possibly the best thing I’ve ever made, just in time for New Year’s Eve.

Once we realized that we would be spending the evening quietly at home, my husband and I decided to throw a little party, just for us. We would cook the fanciest dinner, stir up the fanciest drinks, and don our fanciest clothes.

Very few people actually show a back view of the dress; it’s plain but nice.

Except…I didn’t have any fancy clothes. I did have 2.5 yards of deadstock wine-coloured silk interlock knit and the Kielo dress pattern. My self-satisfaction quickly turned into disbelief as it became clear that I was an entire yard short of fabric, at least. I kicked myself: as a Canadian, I’m accustomed to American pattern companies calling for a certain number of yards, but I buy fabric locally in meters; as a meter is longer than a yard, I always manage with less fabric than they call for. This time, the Finnish pattern company uses meters, and the fabric store I ordered from uses yards, and on top of that, the fabric was narrower than promised. CURSES!

The solution turned out to be simple: I added a waist seam at the back.

See? No big deal. You can’t even tell when it’s wrapped.

Assembling the dress was slightly more work than putting together a t-shirt, but not much. After dinner on December 31 I got dressed and felt downright glamorous. I felt the need to drape myself languidly over the nearest piece of furniture, place my hand upon my breast, and breathily say something about “my diamonds.” Not that I have any, but what else does one do in floor length red silk, except be utterly fabulous?

Darling, freshen my (imaginary) drink, would you?

I don’t think I can overstate how glorious it is to be enrobed in silk. When I first opened the package this fabric came in, my first thought was, “Huh, it’s a bit like nylon.” Nylon was originally formulated to replace silk, so that tracks; both fibres make fabric that is strong and smooth. But oh, the similarities end there! The way silk softly drapes, the way it catches the light, the way it moves, the way it feels–these things are hard to capture on a cell-phone camera, but it’s so different from nylon. It’s incredibly luxurious, and I can only hope that someday I’ll get to swan about in it somewhere other than my living room!

In Summary:

Materials: 2.5 yards of deadstock Italian silk interlock knit, bought for $126 CAD at Riverside Fabrics

Pattern: Kielo Wrap Dress bought for 17 dollars from Named.

Cost: About $143 CAD. This was one of the most expensive things I’ve ever made.

Final Thoughts: The more I wear it, the more I’m delighted with it. While it was uncharacteristic for me to impulse-buy expensive fabric (Black Friday got me this year), it was even more uncharacteristic to actually use it instead of wildly overthinking things and saving it forever for a project that feels “special enough.” The fact that it worked out was a big confidence boost, and a lovely way to close out the year. Happy New Year to us all!

A Grey Cabernet Cardigan

So…as it turns out, there are a lot of, um, fluids involved in the care of an infant. My already sparse wardrobe, further whittled by the requirements of a nursing mom, showed itself to be totally inadequate. I mean, I had one cardigan. One! I eventually bought another, and when we went on a three-day car trip (prior to Omicron, of course), the baby first spat up on one cardigan and then immediately drooled all over the other one. So. More cardigans were in order.

I printed off the Cabernet Cardigan pattern and started on Version C, the shorter and slimmer cut, in grey rayon/polyester ponte. In my sleep-deprived state I only cut out one half of the neckband, and once I realized my mistake, I had no fabric left to cut the other half. To solve it, I used a skinny strip of black ponte knit to a make the neckband the right width.

The construction was extremely easy and straightforward, and delightful to make in a stable ponte knit. I sewed it entirely on my regular machine. The only hiccup was the buttonholes. Because I omitted the interfacing and had made an error with the neckband, it was both slightly narrower and less stable than expected. My automatic buttonhole attachment couldn’t cope. Doing it “manually” with a small zig-zag wasn’t working. I tried adding some stabilizer, which did absolutely nothing. I decided to do it manually–the actual “manually”–and sewed some very mediocre buttonholes by hand with two strands of cotton embroidery thread.

Honestly, when the cardigan’s done up and you’re standing a normal distance away, I don’t think it’s noticeable.

Do ignore the squeaky giraffe in the upper left.

Aren’t the buttons neat? I found these interesting thread-covered buttons in a vintage/craft supply store. Then, I immediately lost them in our utility cart/junk drawer. I procrastinated for a few more weeks, then pulled myself together and found the buttons. The sweater uses four, so I sewed the fifth into the side seam, as they do in ready-to-wear.

In Summary:

Materials: 1.2 meters of grey polyester/rayon ponte from Fabricland ($12), five buttons ($2.75) from Courage My Love. The fabric is just ok–the polyester makes it a bit sweaty to wear and it won’t wash very well, but I’ve had this fabric kicking around for almost a decade, so I’m glad to use it up!

Pattern: Cabernet Cardigan from SBCC patterns ($12, on sale)

Cost: Roughly $26.75 CAD.

Final Thoughts: I’m really pleased with it! I’m fine with thinking of this as a test version, so I’m not overly fussed about the neckband and buttonholes (though they did result in me taking a three-week sulking break from sewing). The sweater is comfortable and fits really well. It’ll be great for when I go back to work, with its wee pockets. It’s also really nice to use a pattern that’s intended for people under 5’4″! I have SO MANY more versions of this planned.

Failed Nursing Pads

This project was a real shot in the dark. I have heard that I need nursing pads, and I’ve read that you can just make them out of circles of fabric, but I don’t have any sense of how thick they need to be, how large they need to be, or how many I would need.

As I was making crib sheets and receiving blankets, I traced a glass to cut circles out of the scraps. I think they’re about 2.5 inches across. Once I was done, I made little piles of circles. Some are four layers of plain cotton, some are two layers of double-gauze, some are three layers of double-gauze, and some are two layers of double-gauze and two layers of single gauze.

I tried assembling them on my serger, but it was disastrous! The circumference is too small and they got all chewed up and wonky-looking. Instead, I used a wide zig-zag on my regular machine. They look fine?

I made ten pairs. As it turns out, though, they’re inconveniently small and should have been more like four inches across. Regardless, I prefer the disposable ones as they have adhesive to stick into my nursing tank tops and stay put.


In Summary:

Materials: Scraps of cotton single gauze, cotton double gauze, and quilting cotton from making receiving blankets and crib sheets.

Cost: None! This was a scrap-busting project.

In conclusion: These were not useful, and were thrown away. Oh well!

Another Swoopy Nursing Top

Right after finishing my test-version, I broke out one of my precious printed knits and whipped up another nursing top! I took these photos shortly before baby arrived, which is why I look 40-and-a-half weeks pregnant.

Anyway, to recap, there are two front pieces. The over-piece is my swing dress, shortened to 21 inches (plus hem allowance) from neck to centre-front, and with a swooping curve cut from the hem to the armscye.

I like that the shape looks a bit like a ghost! OooOOOOoooo

The under-piece is just a matching trapezoid which runs from 1 inch below the armscye to the hem. Because I had only 1.5 m of fabric, I had to cut it with a seam in the centre. The top edge is folded under the make an elastic casing.

Laid together, they look like this:

The back piece is shortened to match the front, and the sleeve pattern piece is unchanged.

I pressed the hem of the over-piece before assembling the shirt.

See, otherwise the unfinished edge would be caught in the side-seam and I wouldn’t be able to fully hem it.

After that, it was basic t-shirt construction, making sure to catch all of the correct layers in the side seams.

For the hems, I did two rows of straight stitching. In retrospect, I wish I’d just used my twin needle instead, because sewing two rows of straight stitches made the fabric flare out just the tiniest bit.

I didn’t have enough fabric to make a matching neckband, so I used a strip of thin cotton/spandex, sewed it on RS together, flipped it under, and top-stitched. It looked terrible and was so constricting that I could barely get the shirt on. I cut it off, pressed down the neckline, and sewed it in place with a twin needle. It worked perfectly.

I’m so pleased with how the shirt came out! It’s incredibly comfortable. The fabric is delightfully soft while still being robust. It was a completely different experience to use a nice quality cotton/spandex compared to a cheap rayon knit! It was so easy to work with–everything from tracing, to cutting, to pinning, to pressing was easier to do.

“Nursing” the teddy bear for illustrative purposes! You can see that the underlay provides near-complete coverage.

Summary:

Materials: 1.5 m peony-printed cotton/spandex from Art Gallery Fabrics, bought on Fabric.com, elastic left over from making sheets. I had the merest handful of oddly-shaped scraps left, so 1.5 m is exactly the right amount for this shirt.

Pattern: Derived from the pattern for this dress, which was traced off of an Old Navy swing dress.

Cost: $30 CAD; the cost of the fabric

In Conclusion: I’m delighted with how this turned out! I’ve been too nervous to cut into this fabric for ages and I’m so pleased to have made something that’s useful and pretty.